Address
304 North Cardinal St.
Dorchester Center, MA 02124
Work Hours
Monday to Friday: 7AM - 7PM
Weekend: 10AM - 5PM
Address
304 North Cardinal St.
Dorchester Center, MA 02124
Work Hours
Monday to Friday: 7AM - 7PM
Weekend: 10AM - 5PM
Creating an NFT (Non-Fungible Token) minting bot allows you to participate in minting events automatically, potentially securing NFTs before they become publicly available or increase in price. This guide outlines the steps to create such a bot, leveraging Solidity for smart contracts, JavaScript for scripting, and tools like Truffle and Ganache for development and testing.
Before starting, ensure you have the following installed:
npm install to install the required dependencies. These include Solidity for the smart contract, Web3.js for interacting with Ethereum, and other necessary libraries.Creating an NFT minting bot is like starting a new adventure. It’s exciting, a bit mysterious, and opens a world of opportunities. This journey into the blockchain and AI intersection begins with two simple steps: getting the code and preparing your toolbox.
Clone the GitHub Repository: First, you need to get the map to the treasure. This map is actually the project code that lives on GitHub, a place where many developers share their work. To start, you’ll clone, which means copying, this project onto your computer. It’s like grabbing all the tools you need from a friend. Here’s the place to find it: https://github.com/dappuniversity/nft_batch_minting. Use Git, a tool that developers use to manage their code, to bring everything to your machine. This is your first step into creating something that works with Ethereum, OpenSea, and follows the ERC-721 standard for NFTs.
Install Dependencies: Next, you need to set up your workspace. Imagine you’re building a model airplane. You’d need glue, paint, and all the little parts before you start. In this case, those parts are software libraries and tools like Solidity (the language you write the smart contract in), Web3.js (how your bot talks to the blockchain), and a few others. To get everything ready, go to your project’s folder on your computer and type npm install. This command tells your computer to grab all the bits and pieces you need from the internet and set them up for you.
By doing these two things, you’re setting up your very own NFT minting bot project. You’re getting ready to dive into the world of NFTs, blockchain, and maybe even AI, creating something that can interact with the Ethereum blockchain and potentially OpenSea, where people buy and sell NFTs. It’s like you’re preparing to join the ranks of creators and tech wizards, exploring how AI and blockchain can come together in exciting ways.
For those intrigued by the blend of AI and blockchain, especially in crafting NFTs, peeking into related projects can be enlightening. Our piece on “How to Create an NFT Minting Bot with Solidity, Web3.js, and ERC-721” at AiIntersection offers a deep dive into the process, showcasing the power of merging AI with blockchain for creative endeavors. You can learn more by visiting AiIntersection.com.
This step is just the beginning. You’re on your way to exploring a vibrant marketplace, harnessing the power of technology to bring your creative visions to life in the digital world.
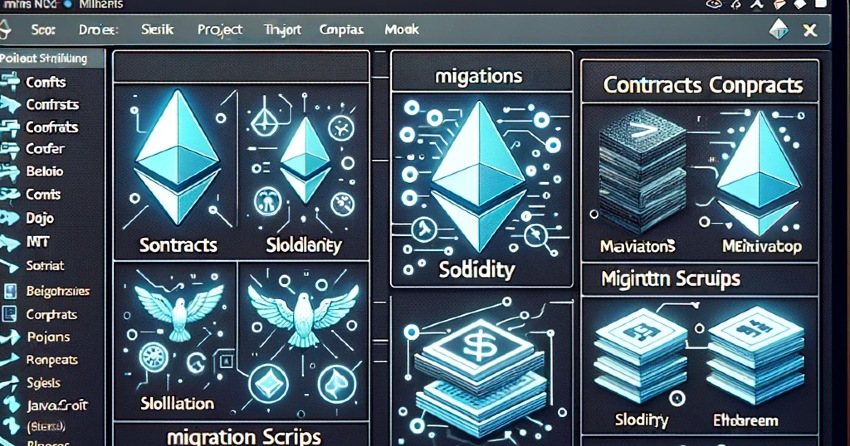
/contracts directory, written in Solidity. These define the logic for NFT minting./migrations directory that help deploy contracts to the blockchain./scripts directory for executing specific tasks like minting NFTs directly.Diving into the world of NFT minting bots, especially those built on the ERC-721 standard and aimed for platforms like OpenSea, feels like exploring a new city. The roads, landmarks, and neighborhoods make more sense as you understand the map. In this case, our map is the project structure, a clear layout of where everything lives in your NFT minting bot project. Let’s break it down into simple parts.
Smart Contracts: Think of these as the rules of the game. Located in the /contracts directory, these files are written in Solidity, a language made just for creating contracts on the blockchain. Here, you define how your NFTs are created, how they behave, and what makes them unique. It’s like setting up the rules for a board game where everyone knows how to play fairly.
Migrations: Now, imagine you want to take your board game from your house to a friend’s place to play. Migrations help you do just that but with your smart contracts. These scripts in the /migrations directory move your contracts onto the blockchain, making them live and playable by anyone. It’s like packing up your game and setting it up at your friend’s table.
Scripts: Finally, we have the /scripts directory, filled with JavaScript files. These are your tools for interacting directly with your smart contracts to do specific tasks, such as minting NFTs. Think of it as having a remote control for your TV. With just a few clicks, you can change the channel, adjust the volume, or turn it off. These scripts give you similar control over your NFTs, allowing you to mint them without manually going through the whole process.
Understanding these three key areas makes navigating your NFT minting bot project much easier. It’s like knowing where the grocery store, school, and your friend’s house are in a new town. With this knowledge, you’re better equipped to explore further, build more complex features, and maybe even integrate AI to create unique NFTs that stand out on platforms like OpenSea.
For those intrigued by the intersection of AI and blockchain, especially in the realm of NFTs, our article “How to Create an NFT Minting Bot with Solidity, Web3.js, and ERC-721” provides a deeper dive. This piece, available at AiIntersection.com, is a treasure trove of insights, guiding you through the process of merging these powerful technologies.
With a clear understanding of the project structure, you’re well on your way to building an NFT minting bot that not only functions well but also opens up new avenues for creativity and innovation in the blockchain space.
mint function within your contract. This function should handle the creation of new NFTs and assign them to the caller’s address.Creating a smart contract for your NFT minting bot is like drawing the blueprint for a house. This step is where your idea begins to take shape in the real world, or in this case, the digital world of the blockchain. Let’s break it down into simple, easy-to-understand steps.
ERC-721 Standard: First, your smart contract must follow the ERC-721 standard. This is like following the building codes for your house. It ensures that your NFTs can live comfortably on the blockchain and visit other places, like OpenSea, where people can see and buy them. The ERC-721 standard is what makes each NFT unique, like how each house has its own address and design.
Mint Function: Next, you need to add a special feature to your smart contract called the mint function. This is like the front door to your house. The mint function is how new NFTs are created and given to the person who asked for them. When someone uses this function, it’s like they’re saying, “I want to make a new NFT,” and the smart contract responds by making one and saying, “Here you go, it’s yours!”
Metadata and IPFS: Now, think about what makes a house a home. It’s all the things inside it and what it looks like from the outside. For NFTs, this is called metadata and images, and they’re often stored on something called IPFS (InterPlanetary File System). IPFS is like a library that anyone can visit to see the pictures and information about your NFT, such as who made it, what it’s called, and what it looks like. Storing this information on IPFS makes sure it’s safe and can’t be changed, making your NFTs last forever in the digital world.
By following these steps, you’re building the foundation of your NFT minting bot, making sure it’s strong and ready for the exciting world of blockchain and NFTs. This is your chance to bring your creative ideas to life, making art that can move across the blockchain, showing up in places like OpenSea for everyone to see and appreciate.
For those curious about how AI can play a role in this innovative space, exploring the AI blockchain intersection offers endless possibilities. Our “How to Create an NFT Minting Bot with Solidity, Web3.js, and ERC-721” article at AiIntersection.com dives deeper into these concepts, providing a comprehensive guide for anyone ready to explore the cutting-edge of digital creation.
With your smart contract in place, you’re not just building something that works; you’re crafting a gateway to a world where technology meets creativity, opening doors to new forms of art and interaction in the digital age.
Deploying a smart contract is like launching a rocket into space. First, you make sure everything is built correctly. Then, you find the right place to launch. Finally, you press the button and watch it soar. For our NFT minting bot, the rocket is our smart contract, and the launchpad is Ganache, a tool that lets us test everything safely.
Using Ganache: Imagine Ganache as your own personal space station where you can test your rocket before sending it to the real space. It’s a program that simulates the Ethereum blockchain on your computer. This means you can try out your smart contract without using real money or affecting the real blockchain. It’s perfect for testing. To start, you open Ganache and create a new blockchain. It’s like turning on your space station and making sure it’s ready for the launch.
Deployment Script: Now, it’s time to prepare the rocket for launch. In the world of blockchain, this means using Truffle, a tool that helps developers manage and deploy their smart contracts. Think of Truffle’s migration scripts as the countdown and launch sequence for your rocket. These scripts tell Truffle how to get your smart contract from your computer onto Ganache, your personal blockchain.
To make sure your NFT has its unique identity, like a name and a symbol, you set these up in your smart contract’s constructor. This is like painting your rocket and writing its mission name on the side. Then, you run a command that tells Truffle to start the launch: truffle migrate --reset. The --reset part is like saying, “Let’s do a fresh launch,” making sure we’re not mixing up this test with any previous ones.
By following these steps, your smart contract is now live on your personal blockchain. It’s like watching your rocket hover in space, ready for its journey. But instead of the vast cosmos, your smart contract is ready to create and manage NFTs that could someday be traded on platforms like OpenSea, thanks to following the ERC-721 standard.
For those curious about how to blend the worlds of AI and blockchain, especially in creating unique NFTs, exploring the AI blockchain intersection can open up new possibilities. A great resource to start with is our guide on “How to Create an NFT Minting Bot with Solidity, Web3.js, and ERC-721” at AiIntersection.com. This guide dives deep into the process, providing you with the knowledge to explore this innovative frontier.
With your smart contract successfully deployed in a test environment, you’re one step closer to launching your NFTs into the vast world of blockchain and digital art, where they can be discovered, traded, and appreciated by enthusiasts across the globe.
mint.js) in the /scripts directory. This script will interact with your deployed NFT contract to mint NFTs.mint function of your contract, specifying any necessary parameters such as the quantity of NFTs to mint or the amount of Ether to send if the minting function is payable.Imagine you’re the captain of a spaceship. Your mission is to explore new worlds. But first, you need to know how to fly your ship. Creating the minting script for your NFT minting bot is a lot like learning to fly. You need the right tools and knowledge to take off.
Script Setup: The first step is to write a special code that tells your spaceship where to go and what to do. This is your JavaScript file, let’s call it mint.js, and you’ll keep it in the /scripts directory. This file is like your spaceship’s control panel. It lets you command your NFT contract to create new NFTs. Think of it as the big red button that says “Mint NFTs” on your dashboard.
Web3.js Integration: Now, to make sure your spaceship can talk to the universe (or in our case, the Ethereum blockchain), you need to use Web3.js. This is like installing a communication device in your spaceship. You’ll need the address of your NFT contract (where it lives on the blockchain) and the ABI (Application Binary Interface) which is like a map that tells Web3.js how to talk to your contract. With these, you can connect to your NFT contract and give it instructions.
Executing Mint Function: Finally, it’s time to take off. To mint NFTs, your script will call the mint function in your contract. This is like telling your spaceship to go to a new planet and claim it. You might need to specify how many NFTs to mint or send some Ether if it costs money to mint them. It’s like setting the coordinates and fueling your spaceship for the journey.
By following these steps, you’re not just flying through space. You’re creating new worlds, or in this case, new NFTs, each with its own unique qualities, ready to be discovered by adventurers on platforms like OpenSea.
For those interested in the intersection of AI and blockchain, especially in the realm of NFTs, exploring how these technologies can enhance the creation and distribution of digital art is an exciting frontier. Our guide, “How to Create an NFT Minting Bot with Solidity, Web3.js, and ERC-721,” available at AiIntersection.com, is a great resource to dive deeper into this innovative journey.
With your minting script ready, you’re now equipped to explore the vast universe of NFTs, bringing your unique creations to life and sharing them with the world.
node scripts/mint.js. This initiates the minting process according to your script’s logic.After setting up our NFT minting bot, it’s like we have built a robot. Now, we need to turn it on and see it work. This is where we use the command line, a place on the computer where we can tell our robot what to do by typing commands.
Command Line Execution: To make our robot start minting NFTs, we need to use Node.js. This is like the robot’s brain that understands JavaScript, the language we used to write our instructions. We go to the command line and type node scripts/mint.js. This is telling the robot’s brain to read our instructions in the mint.js file and do what we said, which is minting NFTs. It’s like pressing the start button on the robot.
Automating Minting: Sometimes, we want our robot to work on its own, like a Roomba that cleans the house by itself. We can do this by adding some extra instructions to our script. These instructions can tell the robot to start minting NFTs at certain times or when specific things happen on the blockchain. It’s like setting an alarm clock for the robot to start working. To make these changes, we need to think carefully about what conditions we want the robot to start working under, like a specific date or when there’s a special event on the blockchain.
By following these steps, we’ve not just built our NFT minting bot, but we’ve also made it run, doing its job of creating NFTs. This process shows how with some instructions and the right tools, we can make something that interacts with the blockchain, creating digital treasures that can be collected, traded, and admired by people all over the world, especially on platforms like OpenSea.
For those interested in exploring more about how technology like AI intersects with blockchain to create unique NFTs, our guide on “How to Create an NFT Minting Bot with Solidity, Web3.js, and ERC-721” provides deeper insights. You can find this resource and more at AiIntersection.com, where we dive into the innovative world of digital creation and blockchain technology.
With the minting script running, our journey from building to launching our NFT minting bot is complete. We have not only created a tool that can bring our digital art to life on the blockchain but also unlocked the door to endless possibilities in the world of NFTs and digital collectibles.
After getting our NFT minting bot up and running, it’s time to make it even better. Think of this step like adding cool stickers and a turbo engine to a car. It’s about making our bot do more, like creating lots of NFTs at once and knowing exactly when to start minting.
Batch Minting: First, let’s talk about making our bot mint more than one NFT in a single go. This is called batch minting. It’s like when you’re baking cookies, and instead of baking just one cookie at a time, you fill the whole tray. This way, you save time and, in the case of NFTs, you also save on gas fees, which is the money you pay to complete transactions on the Ethereum blockchain. To do this, we need to add some new instructions to our mint.js script that tell it to create multiple NFTs whenever it runs.
Monitoring Tools: Next, we want our bot to be smart and start minting NFTs at the perfect time by itself. It’s like teaching a dog to fetch the newspaper as soon as it arrives. We can use special tools and libraries that keep an eye on the blockchain for us, looking for signals that it’s the right time to start minting. These tools can watch for specific events, like the beginning of a minting event, and then automatically tell our bot to start minting NFTs.
By adding these new features, our NFT minting bot becomes more powerful and efficient. It can mint multiple NFTs at once, saving on costs, and it knows exactly when to start minting, thanks to the monitoring tools we set up. This means our bot can do its job even better, creating NFTs that can be shared and enjoyed by people all over the world, maybe even on platforms like OpenSea.
For those interested in diving deeper into how we can merge the worlds of AI and blockchain, especially in the realm of NFTs, our exploration doesn’t stop here. A great place to continue learning is by checking out “How to Create an NFT Minting Bot with Solidity, Web3.js, and ERC-721” at AiIntersection.com. This guide and others like it can offer more insights into the possibilities that lie at the intersection of AI, blockchain, and digital art.
With these customizations and expansions, our NFT minting bot is not just a tool but a gateway to new creative possibilities, enabling us to contribute uniquely to the digital world and the ever-evolving space of NFTs and blockchain technology.
Creating an NFT minting bot involves developing a smart contract that defines the NFTs, deploying this contract to an Ethereum blockchain (like Ganache for testing), and writing a script to interact with the contract and mint NFTs automatically. Tools like Truffle and Ganache facilitate development and testing, while Web3.js allows your scripts to interact with Ethereum. Remember, always test your bot in a development environment before deploying it on the mainnet to ensure it works as expected and complies with any legal and ethical standards.